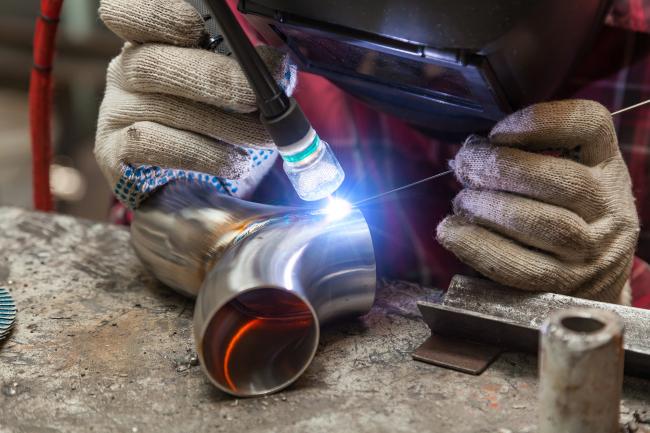
Joining metal together by welding is a skill you can use to repair needed items or create amazing art. You will begin this project by learning the safety guidelines and then move on to learning the skills needed to create or repair items you use every day!
Exploring 4-H Welding
Spark Activity: Welding with Chocolate STEM Activity
Did you know that you can build a bridge out of chocolate? Bridges are usually built out of steel, wood, or concrete and they are used to provide passage over an obstacle that lies beneath them. It is important that they are sturdy and can bear the weight of the loads that cross them. You will need 5 chocolate bars, 4 identical glasses, 2 small paper plates, and coins or other weighted objects.
First, build a Chocolate Plank Bridge. Place two glasses on a solid surface. Unwrap the candy bar and place it between the two glasses, forming a bridge. Place the small paper plate on top of the chocolate plank bridge, ensuring it rests in the free span part of the bridge and not on the glasses. Start placing objects on the paper plate and count how many items the bridge will hold before it begins to break. How much load did you add that caused the bridge to break? What have you learned about this type of bridge design?
Second, build a Chocolate Box Girder Bridge. For this bridge you will need four unwrapped chocolate bars and a glass measuring cup of boiling water (your heat source for the weld). Place two glasses on a solid surface at the same span distance you did for the plank bridge. Unwrap the chocolate bars. Hold the edges of two chocolate bars against the outside of the glass measuring cup. The heat from the hot water will cause them to melt slightly. Press the melted edges together in a right angle and leave to cool. This is half of the box section. Use the same process to weld the other two chocolate bars together. When both of the half sections have cooled, melt the remaining long edges and press them together to form the box girder. Let them cool at least 20 minutes (speed up the process in the refrigerator).
Take a look at the box girder you created. Has it melted and joined perfectly along each edge? Are there places that haven’t stuck or holes along the joints? Is there some distortion so that the beams are not a perfect square in a section? Do you think these factors might affect how strong the bridge is? Now you are ready to test your box girder bridge using the same method you did for the plank bridge. How did your results compare?
Source: The Welding Institute
4-H Project Levels and Goals
- Identify equipment
- Learn safety precautions
- Learn the role of electrodes in welding
- Identify the meaning of electrode markings and select the proper electrode
- Join two pieces of metal: butt joints welded with groove welds and T, and lap joints welded with fillet welds
- Follow welding procedures
- Complete a welding project that is part of the curriculum
- Weld in the vertical position
- Weld in the overhead position
- Use high carbon, spring steel, and alloy steels
- Use low-hydrogen electrodes
- Cut with an oxyacetylene torch
- Weld with an oxyacetylene torch
Put Your Project Into Action
Show Your Skills
- Make a display of fillet welds vs electrode
- Make a display of careers related to welding
- Repair an item (show before and after pictures)
- Build a shelf or a window flower box
- Prepare and give a public presentation on welding safety
- Welding Ready 4 Life Challenge Project
- Welding Maker Project
Service and Leadership
- Repair metal items for a local nonprofit
- Build or repair gates at the fairgrounds
- Create shepherd hooks for a local community garden
- Add handicap access to the buildings and greenspaces of your community by welding wheelchair ramps and adding handrails
- Arrange for your club to tour a welding shop
- Set up a welding workshop and create simple projects for your club members to weld
- Speak to youth about welding careers
- Implement and lead a “4-H Maker Day” and invite both members and non-members to attend
Entrepreneurship
- Create and weld lawn ornaments to sell
- Repair items and charge a fee
- Create custom coat racks to sell
- Write a business plan for a small welding business.
Technology Connection
- Incorporation of robotics, engineering, and computer programming in welding
Connecting with a Mentor
- Local welding shop
- High school welding teacher
- Community college welding program
Events
- 4-H Youth Welding workshop
- 4-H Illini Summer Academies
- Welding Tech Camp at a local community college
Project Manuals & Exhibit Requirements
Purchase manuals on the Shop Illinois 4-H Store.
View exhibit requirements and scoresheets on the Illinois State Fair page.
Careers

- Welding Instructor
- Assembler
- Machine Operator
- Welding Inspector
- Robotics Repair
- Underwater Welder
Start a Conversation
- What skills do you need to be a good welder?
- How would you teach someone about welding?
- What did you learn that surprised you about welding?
Credits
“Arcs and Sparks: Shielded Metal Arc Welding”
North Dakota 4-H Project Sheet - Welding
American Welding Society
The Welding Institute
Authored by Susan Sloop, University of Illinois 4-H Youth Development Educator
4-H Spark Sheets are a collaborative effort of 4-H staff, volunteers, alumni, and teens from across Illinois. A big thanks to the many contributors and reviewers!

